FMP: Week 8 and 9 (but like a month later)
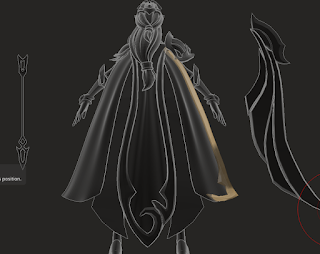
Due to circumstances I have described in my previous post, I am still in the sculpting stage with my Ashe. I have been trying to keep all my subtools clean to nail the retopology stage in one go, so most of what you see below are subdivided clean subtools (apart from the dynameshed feathers, I will need to retopo those later), with the only additional step being the removal of control loops before unwrapping. In the past week I have mainly focused on the back of my character, as well as additional props I knew I will need:
Making the props:
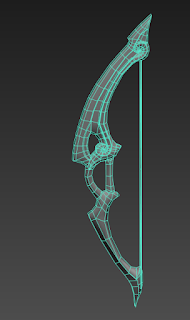
- Basic polygon modeling in 3ds Max. I did not have my pen available at that time so I tried to do as much as I could in Max.- Finished blockout of the bow next to the reference pictures I had.
- I then received this great feedback from Jordan which I'll be applying when I get back to the bow and keep in mind whenever I have to polygon model something again/create dents. I've already applied the shape feedback for the front bit and it helped so much, will show comparison in my next post :)
- References, including Leslie's character from the stream.
- Start to 3 finished variations, all dynameshed from one feather base. Brushes used: SnakeHook, Move, Orb Cracks, Clip.
- Placing the feathers with Deformers - new workflow I learned and will be using a lot :) It's like the FFD modifier in Max but much more interactive and customisable!
Watching Leslie van den Broeck's stream:
https://www.twitch.tv/videos/563703841 To even out topology on cloth pieces in ZBrush: Zremesh -> store Morph Target -> mask out key silhouette points -> polish by features on the unmasked -> restore silhouette by using Morph or by hand
Making the cloth:
This was one of the parts I was scared about because I do not have much experience in cloth making, but, I ended up finding a workflow which I love, which made the whole cloth making part so much more fun! It's so clean and easy and fast! All credit goes to this amazing video by Mercurial Forge:
This was one of the parts I was scared about because I do not have much experience in cloth making, but, I ended up finding a workflow which I love, which made the whole cloth making part so much more fun! It's so clean and easy and fast! All credit goes to this amazing video by Mercurial Forge:
I slightly adapted it because my cloth had a lot of vertical loops, and I used ZModeler -> Edge Selection -> Move by brush radius to basically achieve the same effect. I then smoothed it out with my smooth on 10-15 intensity and voi'la. So easy, so crisp, no need for messy dynamesh :')
Creating the ornaments on cape:
Combination of polygon modeling and ZBrush. I started the base with dynamesh and achieved clean base with Zremesher, I then added loops, evened out the topology and re-modeled some details and pinches which got lost with Zremeshing :)
Hopefully getting close to the wear and tear stage, in my brain, I've spent way too many weeks on sculpting though I know the idea of the timeframe is stretched out by the days I wasn't able to work. But I'm tired of not feeling productive and I'll do my best to get back on full speed :) Hope everyone is well, take care!


Comments
Post a Comment