Posts

Showing posts from October, 2019

PROJECT 1: UV Map

Throughout the past two years of me studying 3D, unwrapping and packing was always something I wanted to get done as fast as possible and didn't want to pay too much attention to as it felt very mathematical and puzzling (even the slightest bit of mathematical thinking requires me to switch into big-brain hard focus mode, which is super tiring, and unwrapping never felt important enough to undergo that switch). However, since this is a handpainted project (and one very close to my heart as it's League related), with very low texture budget where every milimeter of texture density counts, I'm prepared to fight the dragon and try learn how to do it correctly for good. 

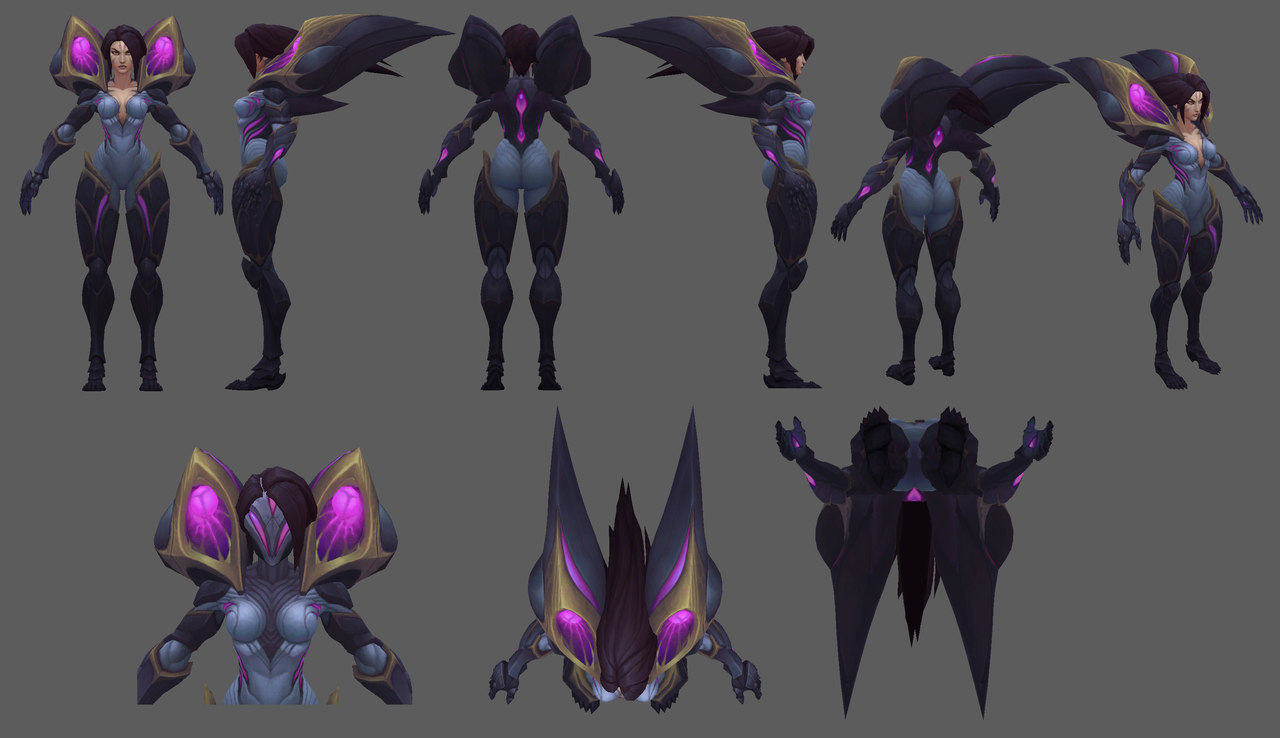
To get an idea of how pros tackle the issue, I did some internet deep-digging and found the texture sheets used in some current League models: 

When analysing these sheets, I tried to deduce and note some common practices, as well as what one can get away with in terms of personal workflow:
1. The face can either be symmetrical or asymmetrical. With good unwrap and controlled stretching, a skilled texture artist can make use of either. If the face is asymmetrical, it tends to be enhanced by a specific lighting (e.g. Aviator Irelia and Warring Kindgoms Katarina [WKK], both of which faces shadowed by hair strands on the actual model)
2. Weapons can have a dedicated texture sheet (I assume 512x512 or smaller?) if they are bigger/more poly dense (e.g. Aviator Irelia, K/DA Kaisa), but they can also be integrated to the main texture sheet like the blade in WKK skin or Regular Kaisa texture if they are small enough/symmetrical...
3. Hair tends to be asymmetrical.
4. Everything is packed as tight as possible, though the islands cannot intersect  (5-10px is recommended spacing).
5. UVs should be mirrored as much as possible
6. Face UVs should take up at least 20% of the body’s UVs so that sufficient detail is retained.
7. Eyes can either be included in face or not (Aviator Irelia).

This analysis helped me make a more informed decision on how I will plan to unwrap my model. I now know that:
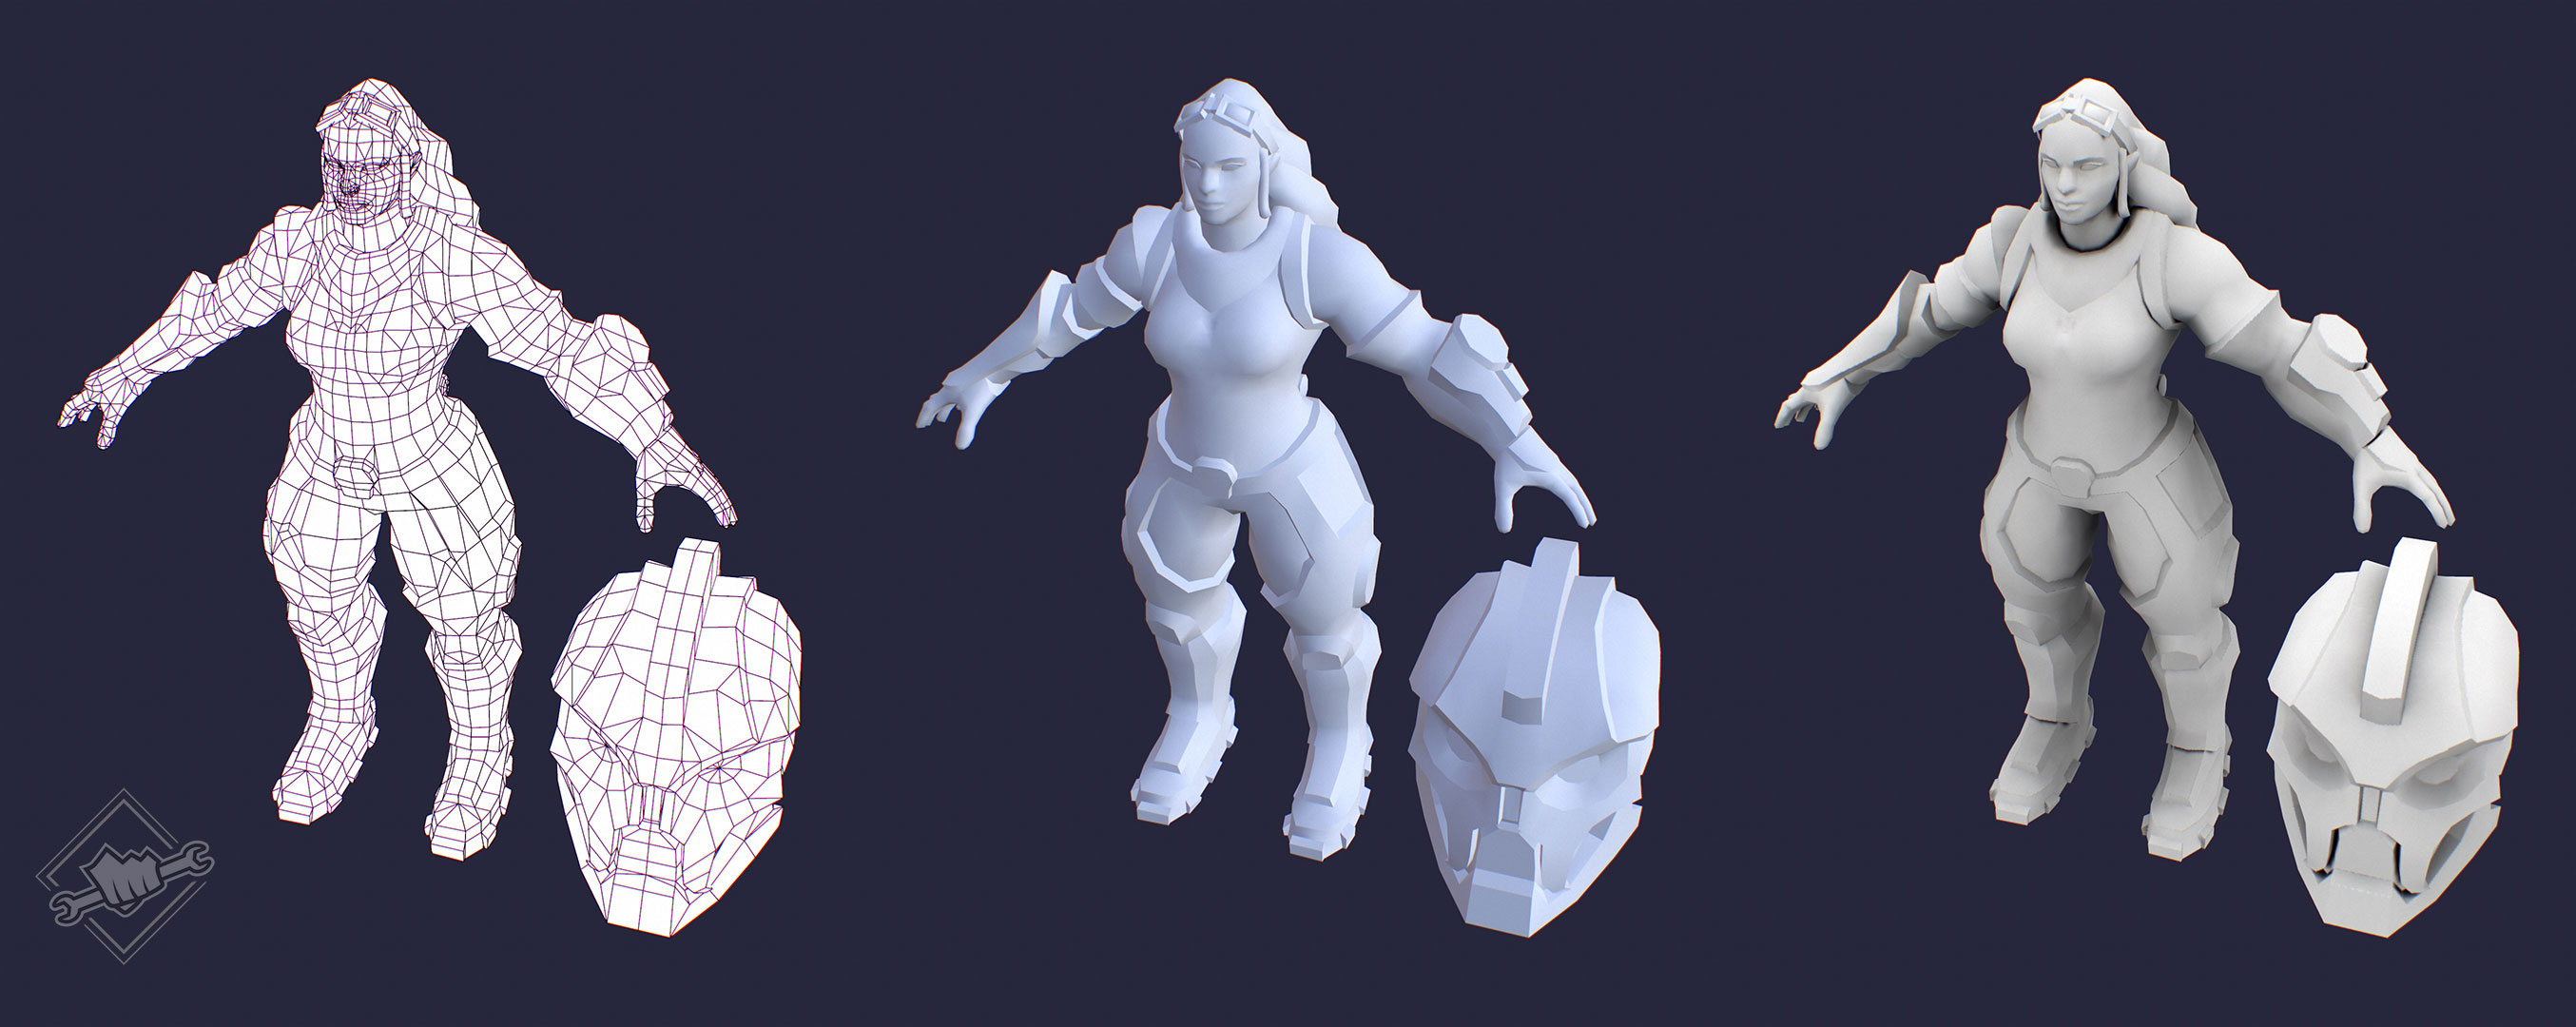
1. I want the face to be asymmetrical: my model does not have hair strands breaking up the facial symmetry as many of the League characters do, therefore I will try to break it up with the warpaint and makeup instead.
2. I will try to keep the eyes attached to the face as seen in WKK texture but if there is too much stretching, I might opt for detaching them as seen in Aviator Irelia.
3. My torpedoes will have a separate texture sheet, they seem too big and too dense to pack with the body and could compromise the quality of the rest of the textures.


My research before starting the Unwrap was also extremely helpful in finally fully understanding the process and learning practices used mainly for handpainting; e.g. from this great video, I found out that the seams on the edge should be kept as square as possible to allow for more efficient packing, I've learnt how to do this and how to use relax + manual vertice adjustments to keep the flow of the textures even with more square edges.

Another good practice was re-using the texture space as much as possible, mainly with less visible parts of the model. For example, in this screenshot you can see the unwrapped face and the attached mouthpiece which is hidden in the head of the model. Normally it would be twice as big, but I made sure to 1. size it down and 2. fold it over itself to half the space as this part of the model will not be seen at all.

As I was packing, I decided to use the great LoL texture reference once again and I overlayed my UVs over the textures to mainly see what scale should my islands be. For example: compared to picture 1, my head UVs felt too small, but compared to picture 2, they felt a little too large. I decided to enlarge the head island as on picture 2, the UV set also includes a weapon and is overall less dense on polys, whereas the model on picture 1 is much closer to the final count of objects I want my final model to consist of (and also has separate UVs for "weapon").

I have been lucky again to get feedback on my UVs and packing very fast, so I was able to make some additional adjustments before I decided on the final version of UVs. My friend suggested making the fur part of the jacket unique, which was a great idea as I went for asymmetrical hair and needed something different to break it up a little bit (and this part of jacket would be seen a lot from the top-down view of the game so it's definitely worth it!).

I looove having options. Maybe a bit too much :D At the end of the UVing process, I saw that I had some free space in my UVs begging to be filled up. I decided to do so by creating two "looks" for my model, both interchangable simply by hiding/deleting geometry. My original model (helmeted) already had a pair of cool aviator glasses on her helmet, but if the helmet was hidden (after all, the actual model of KaiSa in the game only has helmet on very rarely for specific interactions), Kai'Sa had no option of covering her pretty rainbow eyes from the dangers awaiting in Summoner's Rift. Soo I just goofed and created another pair of glasses which would fit under the helmet and also serve as a beautiful accessory.


Final UVs and seams on Kai'Sa.


Final UV's and seams on torpedoes.


Phew, I really need to learn to talk less! Now, finally, off to the (hopefully) best, yet most daunting part: the handpainting.

PROJECT 1: Applying the feedback


I was very lucky to receive an amazing in-depth feedback almost immediately after I asked for it. The friend who gave it to me had some great points I forgot to take in mind when modeling and I feel like applying them really improved the topology at the end.

Main takeaways:
- Stitch head + chest, hands + jacket, leg guards + pants + belt and similar together, as it will be much easier to paint textures on a connected model
- When stitching things together and adding triangles to fit the topology of each piece, make sure to add the triangles on a less-visible part of the model if possible, e.g.: League models are viewed from top-down, therefore, add triangles to the bottom part of the belt when connecting it to the pants as any possible triangular artifacts will be hidden that way
Elements before stitching on the left, elements after stitching on the right. Triangles are kept on the bottom side of the belt.

- Always make sure the original model's pivot is on 0;0;0 and that the vertices which will connect symmetrically are perfectly lined-up to avoid brain-pain during rigging
Left: Pivot points all over the place, unorganised, adds more work than if I would keep them all 0;0;0 from the start. Right: All pivot points at 0;0;0 with model ready to UV and add symmetry to.
- If something doesn't want to reset to 0, reset XForm and try again

- Keep even polygons if possible, better for animation, looks better, just is better if they are square

- Especially with handpainted stuff, check Backface Cull on - many engines will have this activated to only show one side of a poly, and checking this on will prevent you from having accidentally transparent parts of model at the end
- As per previous point, also make sure to collapse or bridge backfacing polys which create holes and transparency

- Always keep in mind what topo you would like to see as a rigger. Working in loops is essential.
 

I've also finished adding smoothing groups to the model and re-designed the turbine/plane thingy to something with a more interesting shape.

I find that I'm learning so much from the project, mainly thanks to the great feedback which allows me to analyse my mistakes. I'll be moving to Unwrapping soon, with this great video as my guide: https://www.youtube.com/watch?v=srdy78-TY6Q 

PROJECT 1: Modeling

The modeling process went on as expected. Lots of extruding, painful topology puzzle solving, endless studying of the League models on the Model Viewer site (but still lots of fun!)...  Main things I tried to focus on were keeping the volume balance of the design and economic use of polys (LoL is quite a low-budget game at the moment). I also tried to use symmetry as much as I could due to super-low texture in-game budget. Not sure how well I've done with either of those,  currently I'm at a point where I'm waiting for final feedback from a friend whose advice I value a lot, so we'll see!

Some useful tips I found when studying the Dota 2 Workshop doc:
- Like textures, geometry typically has a gradient, with the lowest amount of polygons being used around the feet/lower torso and highest density around the head and upper torso.
- Avoid creating long triangles as they tend to cause shading errors, especially during animations.

Starting with the face (cannibalized and adjusted mesh from my previous project, made much more low poly - e.g. the eyeball is not separate as it was in my previous model). Although it is supposed to be a helmeted character, I will still treat the face as one of the most important features -> Kaisa's helmet in a game is only an additional thing she gets when you either transform or do Taunt with her so the "official" design is the non-helmeted one (which will have facepaint as in the concept). I also added a "socket" behind the lips which is sometimes used from animation - not too necessary in my case as I'm not going to have her speak, but good practice as it's a common thing to add to League models.

Use of instances, cannibalizing my 2nd year pirate project (ended up changing the shoe anyway, but served good as a base). 


Figuring out arms, gloves, shoes. The pants topology is super-messy and will change a lot as I go on. Important to look at the model from upwards when adding forms and volumes, as that's the main angle players would view it from.

Simple plane-modeling based on my concept, played around with Push and Bend later to add volume, yet keep polycount.

Styling her up, figuring out the fur coat thingy topology, adding indication of turtleneck, also adding super low poly hair - a bit of an experiment to see what I can get away with in terms of low topo when painting on braids (wish me luck haha).

Helmet, glasses, keeping details balanced, keeping flow. On the right side you can see flat version of buckle I then adjusted to fit the League style a bit more on the actual model. Adding little golden wings to the satchels design to keep the aviator theme going.

When studying original League models, I noticed most of the long-haired champions having hair modeled in a "flying" position, probably for easier rigging and to avoid contact with other parts of the mesh which is not hair. 

The "final" mesh I sent my friend for feedback. I attempted doing smoothing groups on the left Kai'Sa, if they're approved, I will use them in the >>final "final". The turbines are not finished, just a base display of what the shapes and scale might look like.


Topology is cleaner but I am pretty sure it's not good/low enough. I will be waiting for the feedback as it's pretty hard for me to see which loops I could lose at the moment (been staring at this lady every day every night haha).


Main points of feedback I asked about:
 1. Which parts to connect together, e.g. should her arms be connected to the jacket? should her chest be connected to the jacket?
2. The jacket part connected to the breasts has some topology which I tried to clean up for like 3 hours but I still feel like it's wrong especially in the "hem" area. 
3. Overall polycount: is that something viable? Are there any obvious areas where it could be lower?
4. With the jacket, should I keep the little "fur" indication polys (I think I saw it on an Ahri model) or will handpainting it be enough?
5. Is it obvious that she's a pilot/aviator or have I messed up? :D
6. Will I be able to handpaint braids (like in my concept) on the hair topology I have or should I add polys?

PROJECT 1: Choosing the workflow

With my concept ready, I went on to modeling the base in 3ds Max. I already had a previous base mesh I made when doing a personal study of Riot topology over the summer, so this made things significantly easier. As I was modeling, I started thinking about next steps and about the whole workflow. The path to take was a little unclear as I've been focusing on PBR the whole last year and steps to take have started blending together - do I use Zbrush at all? Where do I bake, what do I bake? The questions kept piling up so I decided to do a small research to fully understand what the correct industry workflow is nowadays. I compiled a good number of resources (at the end of the page) and came to the conclusion that although individual steps vary with every artist, generally the handpainted non-PBR asset creation can be achieved through two main workflows:

WORKFLOW VAR. 1 (with Zbrush)

As seen here: https://sketchfab.com/blogs/community/art-spotlight-paladin-alyonushka
1. Start with a base mesh previously made in 3ds Max and ZBrush.
2. Sculpt details in Zbrush (dynames, extract, etc), if model is hardsurface, build it in 3ds Max.
3. Unwrapping in HeadsUVLayout (utilize as much space as possible, textures will be shrunk in game)
4. Baking with Topogun and xNormal: Baking out Skylight map (Hardware AO version), AO (Hardware AO version uncheck skylight) from sculpt
5. Bring into 3dCoat and do a quick AO bake just from the in-game model in 3d Coat
6. Paint in 3d Coat and Photoshop (detailed breakdown on layer modes below) - utilising direct painting in 3D coat and projection painting in PS.
7. Present in Marmoset
(Workflow 1 by Yekaterina Bourykina, https://www.artstation.com/artwork/xYkW)


WORKFLOW VAR. 2 (Direct painting)

As seen here: https://nexus.leagueoflegends.com/en-us/2018/01/battlecast-illaoi-modeling-and-texturing/
This workflow saves time if you feel like you have a solid base model to paint on and feel more confident in texturing without the help of Zbrush detailing. League of Legends models do not require a normal map - if they did, the Zbrush workflow would be the way to go every time.

1. Cannibalizing and reusing old 3D low poly meshes if they have a good/similar topology to what you want the result to look like (alternatively pre-build a basemesh in ZBrush and retopo). Keep in mind: "Creating even a basic model like this one takes a lot of time and goes through many progressions, but since it’ll determine how she moves and looks in game, it’s extremely important to have a solid base to build the skin on."
2. Once the model is done, set up smoothing groups (Note: I need to find out more info about those specifically. The only additional info I found is that the smoothing group seams should correspond with the UV seams, and to try to separate surfaces where edge angles are close to 90 degrees.)
3. Unwrapping.
4. Ambient occlusion bake
5. Bring into 3dCoat, clean up base AO.
6. Painting details with AO: I have already used Ambient Occlusion painting in my previous unreleased digital painting project so I already have at least some gist of what to do. Basically block out forms with shadows - the closer one form is to intersecting with another, the darker the shadow.
7. Blocking out colours with Hard Light mode, detailing with Overlay, Color Dodge, final paintover.
8. Present in Marmoset

(Workflow 2 by Yekaterina Bourykina, https://www.artstation.com/artwork/3abgm)

Because I already had my basemesh ready and I found really good reference in form of an online League of Legends 3D Model viewer, I am feeling confident enough to try to go for the second workflow and only use Zbrush if everything else fails. I hope I won't regret it! 😁

Some additional tips by Katia Bourykina that will definitely be of help:
- "Always reinforce the form when texturing, use Overlay and a Color Dodge pass at the very top of  layer stack to make sure the character still pops."
- "After finishing up all the painting, add gradient so the character's bottom half is a little darker."
- If deciding on doing handpainted (as opposed to PBR), the ZBrush sculpt (if you decide to go that route) does not have to be polished as all the mistakes can be fixed in the diffuse only texture.

PROJECT 1: Designing the concept

I chose the "Helmeted Character" brief as my first project, mainly because it did not ask for a specific style, which means I should be able to practice low/mid poly handpainting on this one without problems. I knew from the start that I wanted to create a skin for, in my opinion, one of the coolest characters in League of Legends up to this date - Kai'Sa, Daughter of the Void.

(Kai'Sa 3D turnaround by Riot Games)
She honestly has it all; thick thighs, badass facepaint, troubled teenagehood (and of course, the required helmet), so picking her was a no-brainer. What she unfortunately did not have was good fan-concepts for her possible skins, which meant I had to pull of a few sleepless nights right from the start to design a wider range of concepts to choose from. When designing these, I sourced the inspiration from: 1. already existing League of Legends skin ranges

(Reference board I used to analyse and choose the final skin ranges. Plus, on the right hand side, a cheat sheet for Riot's new game Teamfitght Tactics, which I played in between designing to keep myself sane. 😄)
2. From the player community itself. It is quite known that Riot places a huge emphasis on interacting with its players' ideas when adding new features to the game, and because I'm a certified League addict (and working for Riot has been my end-game goal ever since I started doing game art), I felt like I should give that practice a go. "Aviator Kai'Sa", one of the skins I designed (and, spoiler alert, subsequently chose to model) was actually suggested in the player forums.

I ended up producing the following (very rough and quick) designs:


 I then decided to ask the League community for help again, when I posted on a Czech LoL Facebook group I was a member of ever since I was a kiddo, asking which one of the skins the players would be happiest to see as a 3D Model or in a game. I got a pretty unexpectedly overwhelming amount of responses, around 100 people commented to share their opinion (in a group where posts get lost fairly quickly because everyone's posting so much) and the result was a close tie among the three, but ultimately, after consulting my art/industry friends for help, I picked Aviator. They felt it read the best in context of the game and was not as generic as the other two. One suggestion I got from someone extremely proficient in handpainted character creation was to re-design the turbines above her shoulders, which is a process I will be showing in my future posts.

STYLE MATRIX: Choosing the projects

Welcome to the first blog post! Final year came much faster than expected but I feel ready and excited to finally fully focus on stylized characters, learning the daunting art of handpainting textures and on deep-diving into human anatomy. I prepared some small mind-maps for the projects I chose. No. 1 and 3 were already approved by teachers during the first lesson, the second one is unsure as it does not specifically follow the brief, though I really hope it will still pass as I've wanted to try designing creatures in Riot style for quite some time. I'm super-excited for the first one - although the brief is only for 3D, I seriously love to torture myself and I've decided to design the concept as well (though, it doesn't feel like too much of a torture when I remind myself it's basically a skin design for one of my favourite ADCs in League, yay). I've gotten a lot of feedback on my characters during Industry Workshops and I'm looking forward to the challenge of applying it all.